
Right, thought I better be of some use or of use to some of you, whichever I have decided to do a post about photoshop! So for those of you that don't know, this is a mini tutorial on using adjustment layers. I have used CS3 on a mac so things may differ if using a older / newer version or a PC.
Adjustment layers basically allow you to adjust curves, colour balance, saturation, levels and various other common editing tools by layer, so you can target different areas of the image rather than the
whole thing. This is particularly useful when colour managing an image as you can concentrate on the skin, then the hair, then the background and so forth building up as many layers as you like. Plus you use the brush so can choose opacity and the use of layers allows you to alter opacity as well.
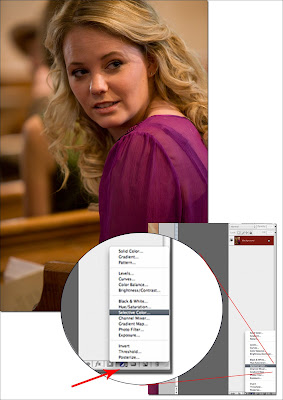
So open your image. Choose the area to focus on. In this case I am reducing the red in the face and the yellow in the background. First your go to the layers palette and select the 'adjustment layer' tool. A new layer will appear with whatever adjustment you have chosen. In my example you can see that I have used the selective colour tool, therefore my new layer is concentrating on adjusting various colour channels within the image.
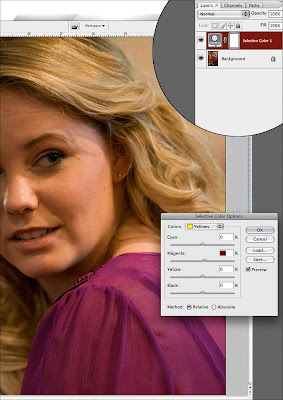
Adjust as you would but concentrate only on the part of the image you want to change. So in this c
ase I am adjusting the magenta / red in the face. Don't worry about anything else in the image, just the part you want this colour adjustment to apply to.
Once done select the mask on the layer, take the brush tool, make sure black is selected and choose your opacity. I would recommend 50% at first, subtle but it works. Then brush back in those areas you do not want the changes to take place. So, in this case I brushed back in the clothes, background and hair so that the adjustment only affected the face. You can then adjust the opacity of the layer if you wish.
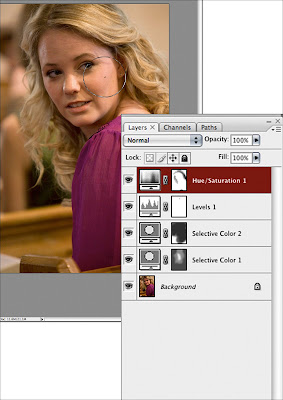
You can also do as many layers as you like. So the next example shows a few more colour adjustment layers and you can see from the mask where the picture has been affected and where it has not. Each new layer will concentrate on a different part of the image.
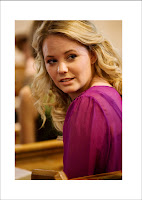
Once you have what you want and you are happy with the adjustments you can carry on editing as normal!
PS: For skin, selective colour is often used. However I find that using the hue/saturation tool is just as effective when using layers and just change the hue ever so slightly and the saturation of the magenta.
More random ramblings and tips and tricks to follow next week! If there is something in particular you want to know.....get in touch!
Carli x
No comments:
Post a Comment